How to create an Amazon EKS Cluster?
Welcome to the world of Amazon Elastic Kubernetes Service (Amazon EKS)! Whether you’re a seasoned developer or just starting out, the ability to manage containerized applications efficiently is crucial in today’s tech landscape. Amazon EKS simplifies the process, allowing you to leverage the power of Kubernetes without the complexity of setting it up from scratch.
In this guide, we’ll walk you through the essentials of Amazon EKS, its standout features, and a comprehensive guide on creating your own EKS cluster. So buckle up and prepare to dive into the seamless integration, scalability, and security that EKS brings to your Kubernetes deployments.
Overview of Amazon EKS:
- Amazon Elastic Kubernetes Service (Amazon EKS) is a managed service that removes the need to install, operate, and maintain your own Kubernetes control plane on Amazon Web Services (AWS).
- Kubernetes is an open-source system that automates the management, scaling, and deployment of your containerized applications.
Features of Amazon EKS:
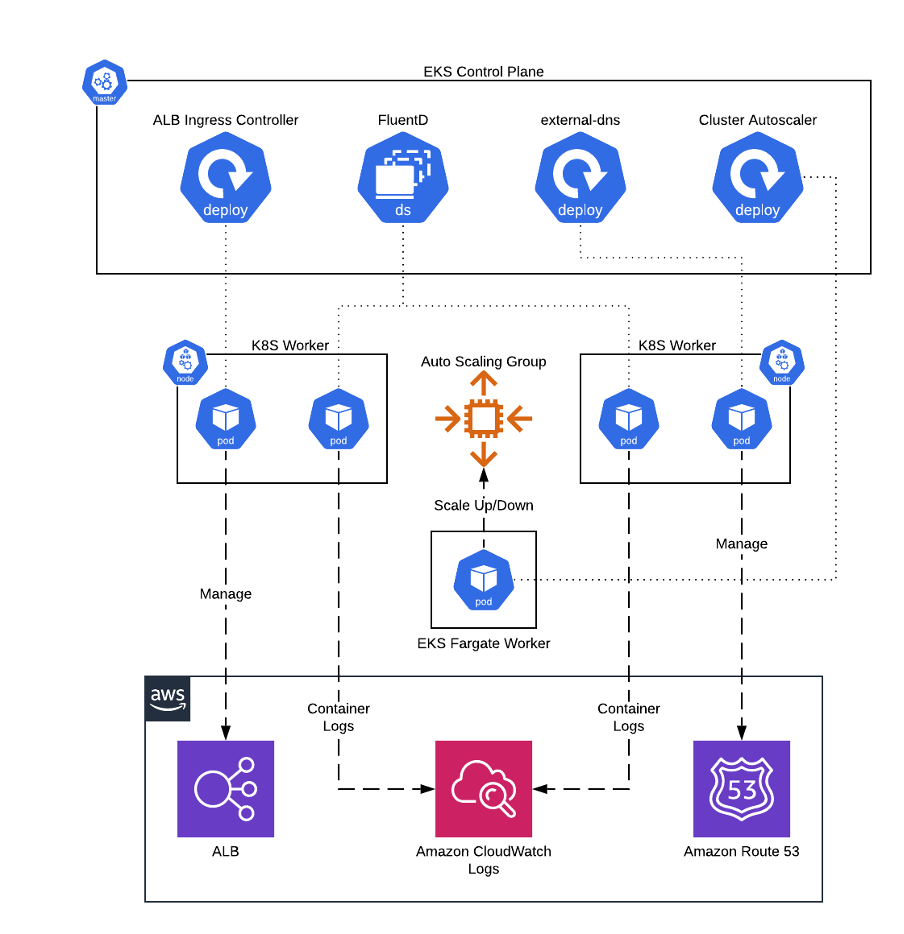
- Managed Kubernetes Control Plane: Amazon EKS takes care of the control plane (master nodes) of your Kubernetes cluster, ensuring high availability and scalability. You don’t have to worry about the operational overhead of managing the control plane.
- Automated Updates and Patching: EKS provides automated updates and patching for the Kubernetes control plane. This ensures that your cluster is always running the latest version of Kubernetes without manual intervention.
- Integration with AWS Services: EKS seamlessly integrates with various AWS services like Amazon EC2, Amazon ECR, Amazon RDS, and more, making it easier to build and deploy containerized applications that leverage other AWS resources.
- Secure and Isolated: EKS provides strong security controls, including fine-grained IAM roles, VPC isolation, and network policies, to help secure your containerized workloads.
- Multi-Availability Zone (AZ) Support: EKS allows you to create multi-AZ clusters for high availability and fault tolerance. It automatically spreads your worker nodes across multiple AZs.
- Scalability: You can easily scale your Kubernetes cluster by adding or removing worker nodes to meet the demands of your applications. EKS automatically handles scaling and load balancing.
- Integration with AWS Fargate: EKS can integrate with AWS Fargate, allowing you to run containers without managing the underlying EC2 instances. This is particularly useful for serverless and fully managed container deployments.
- Monitoring and Logging: EKS integrates with AWS services like Amazon CloudWatch and AWS CloudTrail for monitoring and logging of your cluster and application metrics.
- Support for Spot Instances: EKS allows you to use Amazon EC2 Spot Instances to reduce your compute costs while maintaining high availability through a combination of Spot and On-Demand Instances.
- Container Registry Integration: EKS seamlessly integrates with Amazon Elastic Container Registry (ECR), making it easy to store, manage, and deploy container images securely.
- AWS App Mesh Integration: You can integrate your EKS clusters with AWS App Mesh for microservices observability and service mesh capabilities.
- Cluster Autoscaler: EKS supports the Kubernetes cluster autoscaler, which automatically adjusts the number of worker nodes based on the resource requirements of your pods.
- Serverless Kubernetes: EKS provides the Fargate integration for running containers without managing the underlying infrastructure, enabling a serverless approach to Kubernetes workloads.
- Kubernetes Ecosystem Compatibility: EKS is fully compatible with the Kubernetes ecosystem, allowing you to use Kubernetes-native tools and applications.
Prerequisites:
- AWS CLI:
- The AWS Command Line Interface (AWS CLI) is a unified tool that helps you manage all your AWS services. With just one tool to download and configure, you can easily control multiple AWS services from the command line and also automate them through scripts.
Install AWS CLI:
curl “https://awscli.amazonaws.com/awscli-exe-linux-x86_64.zip” -o “awscliv2.zip”

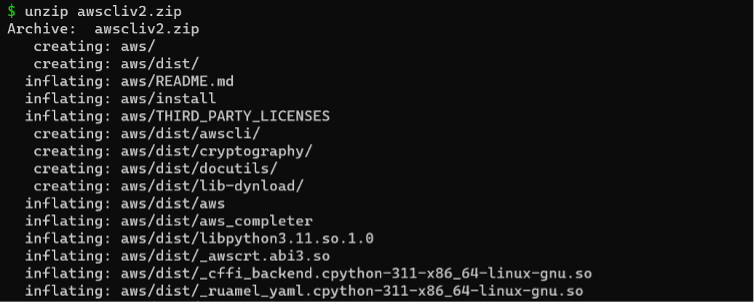
unzip awscliv2.zip
sudo ./aws/install
export PATH=/usr/local/bin:$PATH
source ~/.bash_profile

Note: verify AWS CLI is installed or not, by using the below command.
aws -–version

- Kubectl:
- Kubectl is the Kubernetes-specific command line tool that lets you communicate and control the Kubernetes clusters.
- Whether you’re creating, managing, or deleting the resources on your Kubernetes platform, kubectl is an essential tool for you.
Install kubectl:
sudo curl -o /usr/local/bin/kubectl \
https://s3.us-west-2.amazonaws.com/amazon-eks/1.27.4/2023-08-16/bin/linux/amd64/kubectl
sudo chmod +x /usr/local/bin/kubectl
Note: verify kubectl installed or not, by using below command.
kubectl version –client=true –short=true

- Eksctl:
- Eksctl is used to manage AWS resources (including the EKS cluster itself) and is AWS-specific. It talks to the AWS API endpoints and is more of a replacement for the AWS CLI.
- Kubectl is an official part of Kubernetes which is used to query and manipulate Kubernetes resources, so it will work on any Kubernetes cluster.
Install eksctl:
curl –silent –location “https://github.com/weaveworks/eksctl/releases/latest/download/eksctl_$(uname -s)_amd64.tar.gz” | tar xz -C /tmp
sudo mv -v /tmp/eksctl /usr/local/bin
Note: verify eksctl is installed or not by using the below command.
eksctl version

Create EKS Cluster using eksctl:
eksctl create cluster –name=eks-demo57 \
–region=us-west-2 \
–zones=us-west-2a,us-west-2b \
–without-nodegroup
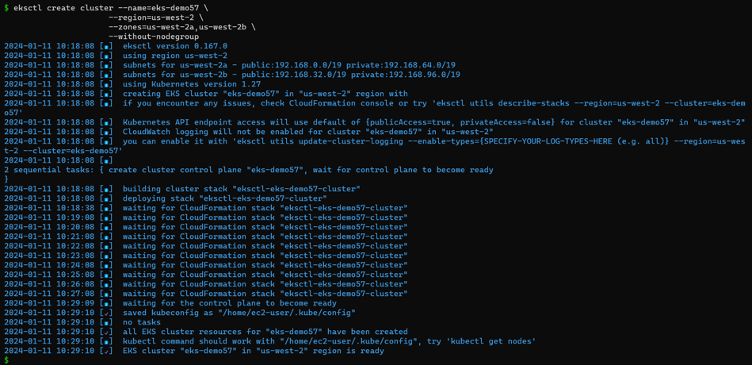
Check EKS cluster in aws console

Create & Associate IAM OIDC Provider for our EKS Cluster:
- To enable and use AWS IAM roles for Kubernetes service accounts on our EKS cluster, you need to create & associate OIDC identity provider.
- To do so using `eksctl`, you can use the below command.
- Use the latest eksctl version (as of today the latest version is `0.21.0`)
eksctl utils associate-iam-oidc-provider \
–region us-west-2 \
–cluster eks-demo57 \
–approve

Create nodegroup in private subnets:
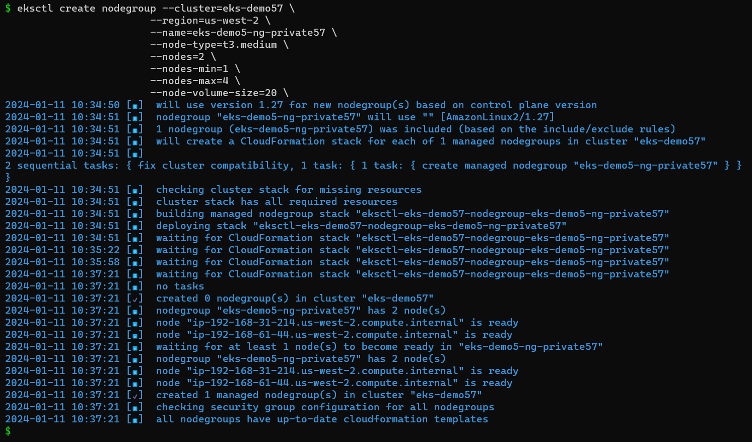
eksctl create nodegroup –cluster=eks-demo57 \
–region=us-west-2 \
–name=eks-demo5-ng-private57 \
–node-type=t3.medium \
–nodes=2 \
–nodes-min=1 \
–nodes-max=4 \
–node-volume-size=20 \
–ssh-access \
–ssh-public-key=autoscaling-key \
–managed \
–asg-access \
–external-dns-access \
–full-ecr-access \
–appmesh-access \
–alb-ingress-access \
–node-private-networking
Summing Up
You’ve just navigated through the intricacies of setting up an Amazon EKS Cluster. From understanding the robust features of Amazon EKS to installing the necessary CLI tools and finally spinning up your own cluster and node groups, you’re now equipped to take on the Kubernetes world within the AWS ecosystem.
Remember, the journey doesn’t end here! With your cluster up and running, you’re set to deploy applications, manage workloads, and optimize your container management processes. Keep exploring, keep learning, and let Amazon EKS be the backbone of your scalable, secure, and resilient containerized applications.


